


ImmiAccount is the official Department of Home Affairs portal where you create, manage and track your Australian visa or citizenship application, and the first task on your list is simple: set up an Individual account, verify your email and switch on multi-factor authentication. Once those three steps are done, you are ready to start a real application rather than just browsing options.
TL;DR:
- Choose an Individual account for your own or a family member’s application; Organisation accounts serve agents, employers, and education providers managing multiple cases.
- Use an authenticator app rather than email codes, which can be delayed or expire; keep the shared secret key securely in case you replace a phone.
- Upload legible scans of originals, not document photos, avoid password protected PDFs, use accredited translations, and keep local copies because uploaded files cannot be retrieved.
- Choose the visa product carefully before lodging; afterward, use the same dashboard to track progress, update contact or passport details, and answer document requests.
- Some identity checks completed through the Immi app may appear in ImmiAccount within about 24 hours; monitor other requests through the dashboard.
Table of Contents
- How to create an ImmiAccount and pick the right account type
- Setting up multi-factor authentication and recovery options
- Scanning, formatting and attaching your documents correctly
- Starting, tracking and updating your application in ImmiAccount
- Organisation accounts and what an OAA actually does
- Fixing login, payment and upload errors quickly
- What applicants consistently get wrong with ImmiAccount
- Our take: the account itself is rarely where applications fail
- How Fewa can help with your ImmiAccount application
- FAQ
- Sources
- Official Department of Home Affairs pages and Fewa resources
How to create an ImmiAccount and pick the right account type
Before you touch the registration form, decide which account type fits your situation. An Individual account suits you if you are applying for yourself or helping a family member with their own application. An Organisation account is built for registered migration agents, employers and education providers managing applications for multiple clients or staff. Most first-time applicants need an Individual account.
Once you know your account type, follow these steps:
- Go to the ImmiAccount homepage and select “Create ImmiAccount”.
- Choose “Individual” unless you are registering on behalf of an organisation.
- Enter a personal email address you check regularly and will keep access to for years, since this account will track long-term applications.
- Open the verification email the Department sends and confirm your address before the link expires.
- Set a strong password and choose your secret questions, writing both down somewhere secure.
- Log in for the first time and complete your profile details exactly as they appear on your passport.
Before you start, scan your passport, birth certificate and any supporting evidence at high resolution so you are not scrambling for documents mid-application. Use an email address you control personally rather than a shared family inbox or a work account you might lose access to. Note your username and secret question answers somewhere other than your memory. According to the Department’s own guidance, your ImmiAccount login details need to stay current and secured with multi-factor authentication, so getting the basics right at setup saves you headaches later.
Setting up multi-factor authentication and recovery options
ImmiAccount requires multi-factor authentication before you can lodge most applications, and you have two choices. The Department’s MFA guidance outlines them clearly:
- Authenticator app (recommended): apps like Google Authenticator, Microsoft Authenticator or Duo Mobile generate a time-based one-time password (TOTP) that refreshes every 30 seconds.
- Email token: a code sent to your registered email each time you log in.
Authenticator apps tend to be more reliable than email tokens, since email codes can be delayed by corporate spam filters or simply expire before you act on them.
To set one up, open your chosen app, scan the QR code ImmiAccount displays (or enter the shared secret key manually), and enter the six-digit code it generates to confirm the link.
If you lose access to your authenticator app, use the “I no longer have access to my MFA app” recovery flow, answer your secret questions, or contact your Organisation Account Administrator if you hold an Organisation account.
Pro Tip: Set up your authenticator app on a device you are unlikely to replace soon, and keep a backup note of the shared secret key somewhere secure in case you change phones.
Scanning, formatting and attaching your documents correctly
A large share of application delays come down to document uploads done poorly, not missing evidence. The Department’s attach documents guidance sets out what is accepted, and the rules are worth following precisely:
- Scan original documents (never photos of documents) at a resolution that stays legible once compressed.
- Avoid encrypted or password-protected PDFs, since ImmiAccount will reject them outright.
- Keep file sizes within the portal’s limits by compressing images before upload rather than relying on the system to do it for you.
- Name files clearly, for example “passport_bio_page” rather than “scan001”, so you and any reviewer can identify them at a glance.
- Use an accredited translator for any document not in English.
Once you upload a document, you cannot retrieve it from ImmiAccount afterwards, so keep your own copies of everything you submit, organised by application and filename. If your visa stream requires Form 80, prepare it alongside your other evidence rather than treating it as an afterthought, and double check the full visitor visa document checklist if that is the stream you are applying under.
Starting, tracking and updating your application in ImmiAccount
Once your account and documents are ready, ImmiAccount becomes your dashboard for the entire application lifecycle.
- From your homepage, select “New Application” and choose the visa or citizenship product that matches your circumstances; choosing the wrong application type is one of the most common and costly early mistakes.
- Complete the form, attach your documents, and pay the application fee securely through the portal.
- Check your application status any time from the dashboard; some identity checks completed through the Immi app are reflected in ImmiAccount within around 24 hours.
- Update your passport number, address or contact details directly through your account if your circumstances change after lodgement.
- Attach extra documents after submission if the Department requests them, using the same account you lodged with.
- Withdraw an application through the proper withdrawal function in ImmiAccount if your plans change, rather than simply abandoning it.
If you already hold a visa and want to confirm your status separately, our guide to checking visa status online through VEVO covers that process in detail.
Organisation accounts and what an OAA actually does
If you are working with a registered migration agent or an employer sponsoring your visa, you may be added to an Organisation account rather than managing everything through your own Individual login. Requesting access usually means the Organisation Account Administrator (OAA) sends you an invitation to join.
- OAAs can invite new users, reset passwords and MFA for staff, and suspend or remove user access.
- Organisation accounts often come with added functions such as VEVO access, though these carry their own permission limits.
- If something goes wrong within an organisation account, ask your OAA before lodging a request with the Department’s technical support, since many issues are resolved at the organisation level.
Fixing login, payment and upload errors quickly
Most ImmiAccount problems fall into a handful of predictable categories, and the Department’s common issues guidance addresses nearly all of them.
- Login trouble: double check your username and password, confirm you are using the correct MFA method, and retry your secret questions carefully.
- Upload failures: verify the file format and size against the published limits, try a different browser, clear your cache, or re-save the file in a compatible format.
- Payment errors: confirm your card details and try again before assuming the portal itself is at fault.
If none of that resolves your issue, use the ImmiAccount technical support form rather than submitting the same request repeatedly, since doing so will not speed up processing.
Pro Tip: Try logging in from a different device before contacting support. A surprising number of “account locked” errors turn out to be browser cache issues rather than genuine lockouts.
What applicants consistently get wrong with ImmiAccount
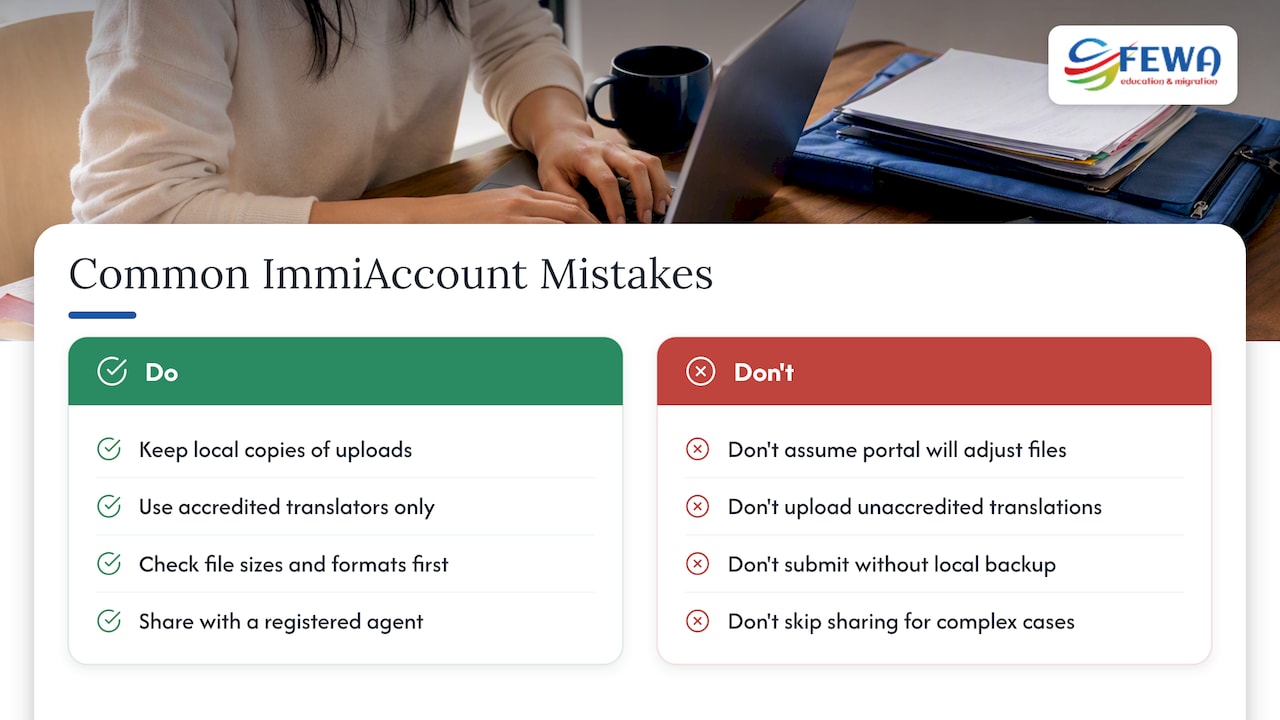
Working through migration files day to day, a few patterns show up again and again. Applicants upload documents without keeping a local copy, then panic when the Department asks for a clearer scan and they cannot retrieve what they submitted. Others attach a translation done by a friend rather than an accredited translator, which can hold up an otherwise complete file.
Before uploading anything, confirm your file sizes and formats against the published limits rather than assuming the portal will adjust automatically. If your case involves multiple family members, sponsorship evidence or a complex visa history, sharing your application with a registered migration agent through ImmiAccount’s share function often catches errors before they become delays, rather than after.
Our take: the account itself is rarely where applications fail
Most guidance on ImmiAccount focuses on the mechanics: click here, upload there, enter this code. That part is genuinely straightforward once you have done it once. The account itself is not where applications usually run into trouble.
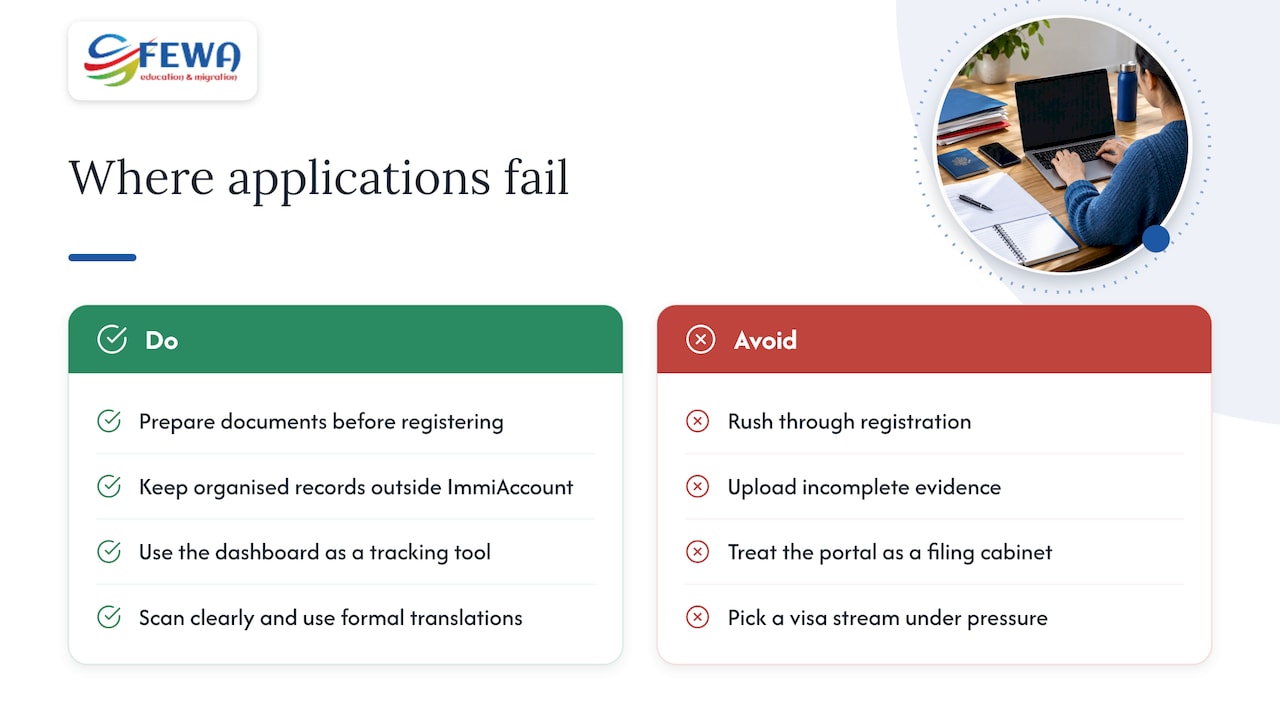
What actually causes delays is what happens before you log in: incomplete evidence, documents scanned poorly, translations done informally, or the wrong visa stream selected under time pressure. Spending an extra hour preparing documents before you touch ImmiAccount will save you far more time than rushing through registration.
If there is one habit worth adopting, it is this: treat your ImmiAccount dashboard as a tracking tool, not a filing cabinet. Keep your own organised records outside the portal, because once something is uploaded, it is gone from your side of the screen for good.
— Ronit
How Fewa can help with your ImmiAccount application
We help applicants prepare documents correctly the first time, choose the right visa stream before lodgement, and share applications with a registered migration agent when a second set of eyes matters. 
Before reaching out, gather your passport details, evidence of your circumstances and any translated documents you already have. We offer a free consultation to talk through your situation, and our visa services page covers student, partner, skilled, family and employer-sponsored streams if you want to see what applies to you.
FAQ
How to use ImmiAccount?
Create an Individual or Organisation account, verify your email, set up multi-factor authentication, then start a new application from your dashboard. From there you attach documents, pay your fee and track your status directly through the portal.
What are the 5 basic steps to apply for a visa?
In broad terms: create your ImmiAccount, choose the correct visa product, gather and attach your supporting documents, pay the application fee, then track and respond to any follow-up requests. Each step happens inside the same portal, so getting your document preparation right before you start makes the rest move faster.
What are the steps involved in the Australia visa process?
After lodging through ImmiAccount, your application moves through document verification, any requested identity or health checks, and a decision stage, with some identity checks reflected in your account within around 24 hours. You can monitor progress and respond to requests for more information through the same dashboard throughout.
What are the new immigration rules for Australia in 2026?
Visa rules and settings change periodically, and the authoritative source is always the Department of Home Affairs rather than secondary summaries. If you are planning an application, checking the Department’s own pages for your specific visa stream before you lodge is the safest way to confirm current requirements.
I lost access to my MFA app. What should I do?
Use the “I no longer have access to my MFA app” option on the ImmiAccount login screen and answer your secret questions to regain entry. If you hold an Organisation account, your Organisation Account Administrator can also reset your MFA on your behalf.
Official Department of Home Affairs pages and Fewa resources
For account creation, MFA setup, document attachment and troubleshooting, the Department’s own ImmiAccount help pages are the authoritative reference. If your supporting evidence includes proof of address, this rental checklist guide is a useful reference for structuring that evidence clearly.